
TABLE OF CONTENTS
- Camera Registration by the Photographer
- Camera Assigned by the Admin
- Viewing the Camera Assignment History
- Assigning a Camera for Maintenance
EVA has two modes for assigning images to a photographer: Match by Camera Hardware ID and Match by File Name or Folder. This article explains how to manage and assign cameras when using the Match by Camera Hardware ID option. For more information on adding cameras to EVA, click here.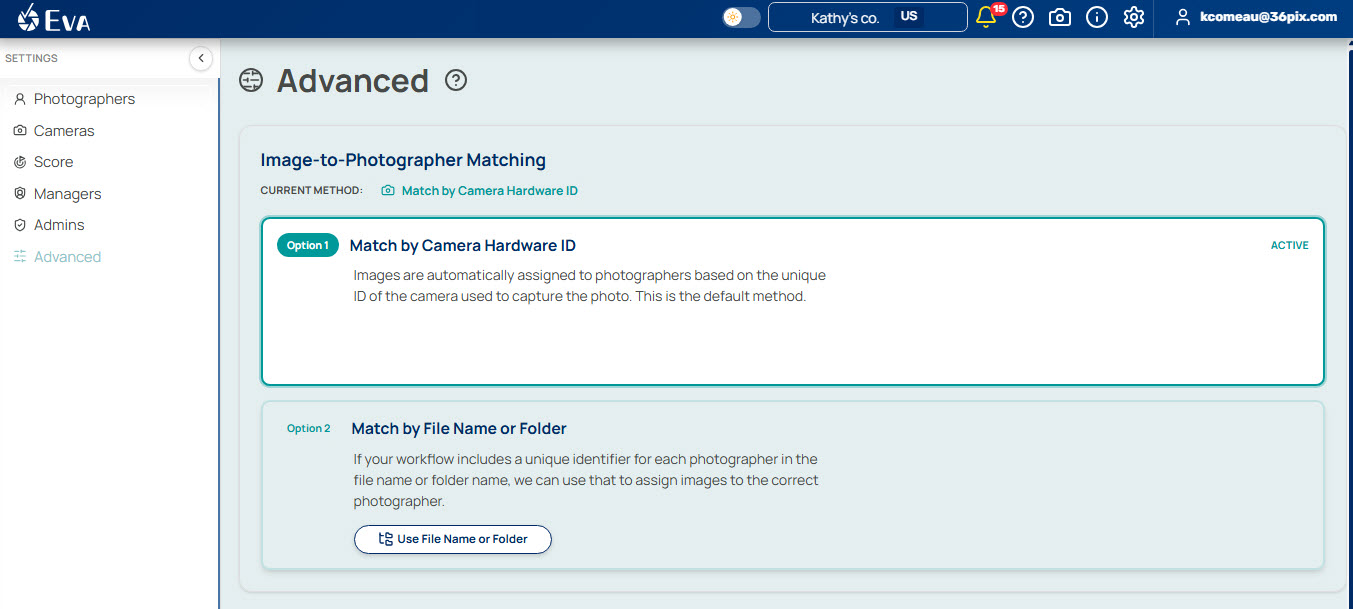
1. Camera Registration by the Photographer
Each photographer can register their camera(s) by logging into EVA and uploading a recent photo taken with the camera they want to register. EVA will read the image's exif data to identify the camera's unique hardware ID, and assign this ID to the photographer. 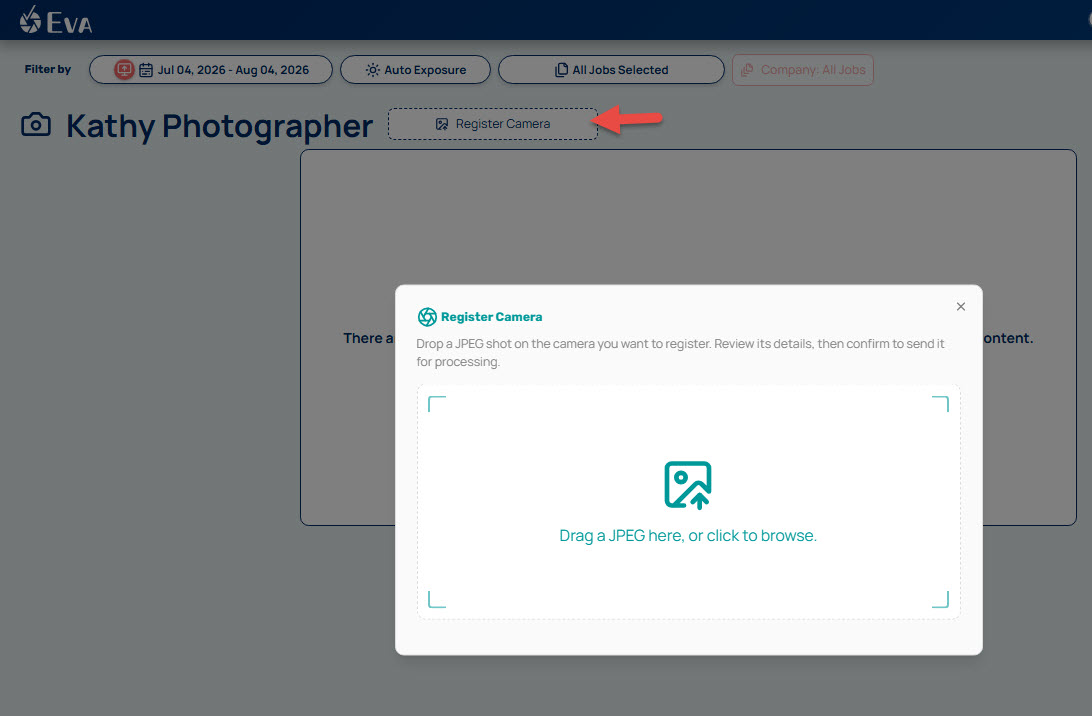
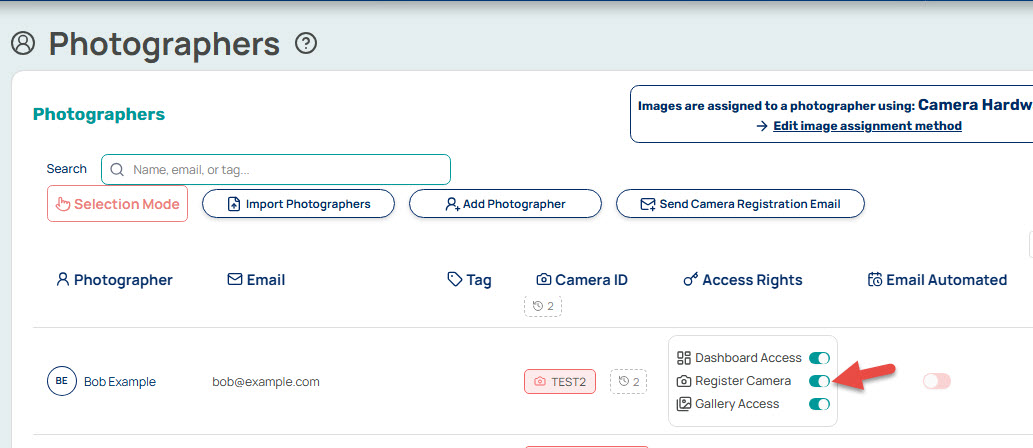
- When a photographer is added to EVA, they will automatically receive an email prompting them to register their camera as long as the following criteria are met:
- The account is in Match by Camera Hardware ID mode
- Register Camera is enabled
Automated camera registration email:
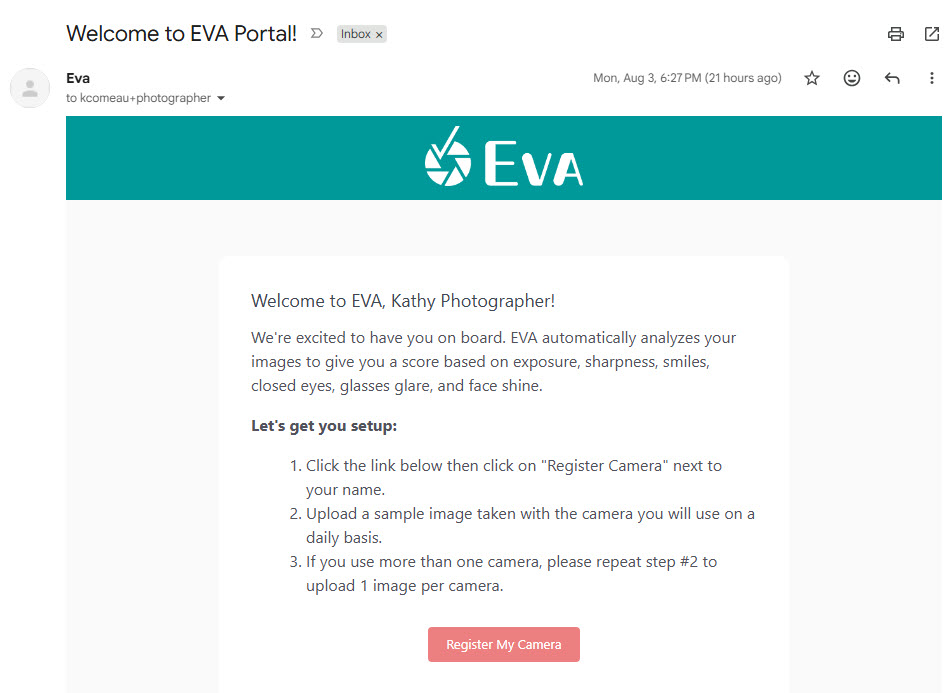
- An admin can resend the camera registration email to a photographer at any time by:
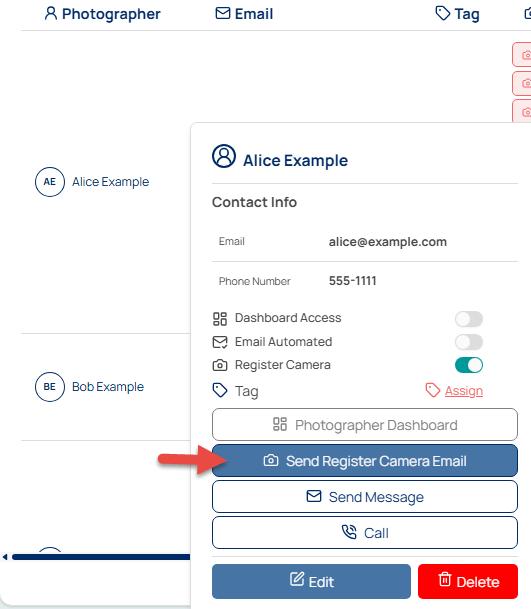
- Clicking the photographer's name and clicking "Send Register Camera Email"
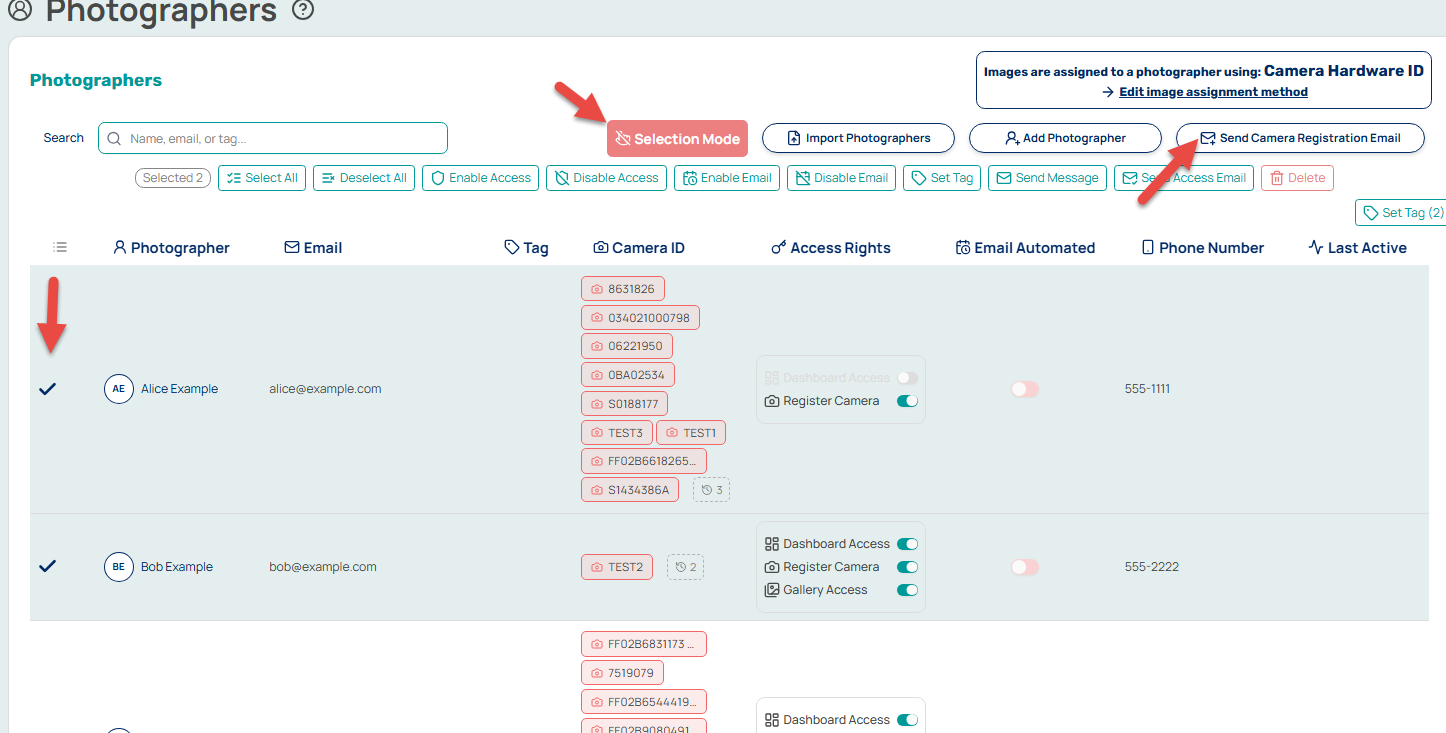
- Entering Selection Mode on the Photographer page, selecting the photographers you wish to send the reminder email to, and then clicking "Send Camera Registration Email"
- Clicking the photographer's name and clicking "Send Register Camera Email"
Keep in mind that "Register Camera" must be enabled for each photographer you wish to send the email to.
2. Camera Assigned by the Admin
If images are uploaded to EVA from a camera that has not yet been assigned, there are a few ways an admin can assign the camera to a photographer.
From the Dashboard.
- Click on an unassigned Camera ID:
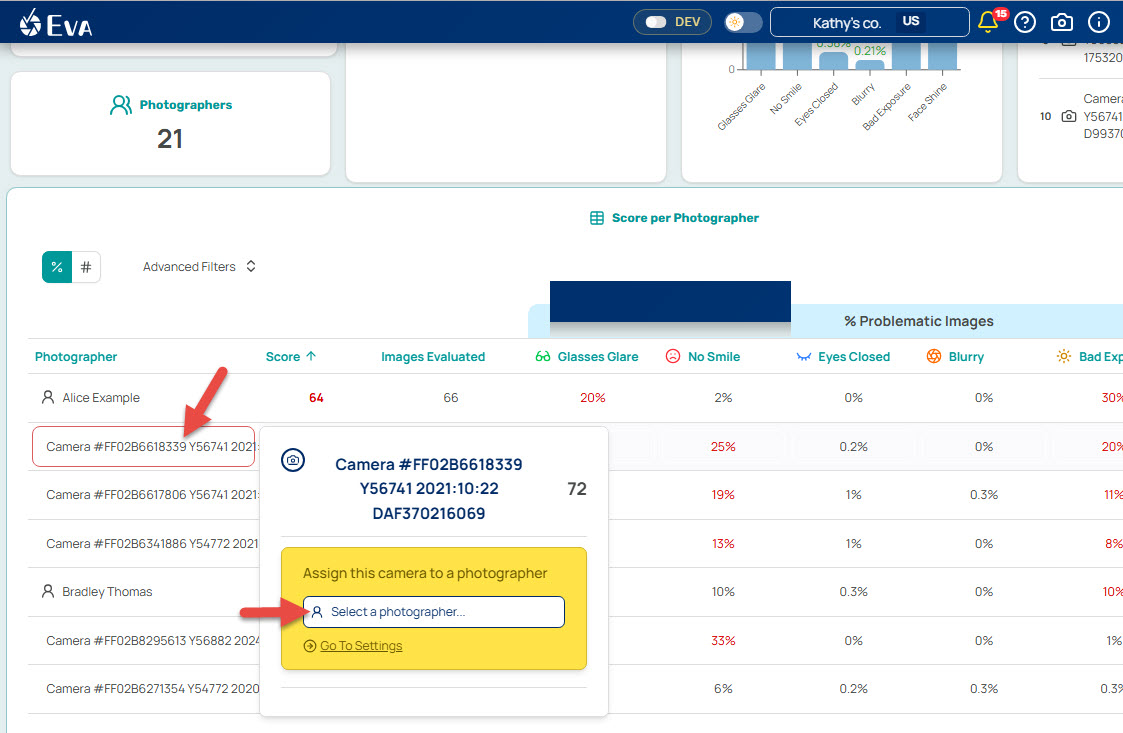
- Click on an unassigned Camera ID:
From the Photographer page.
- Click this icon:
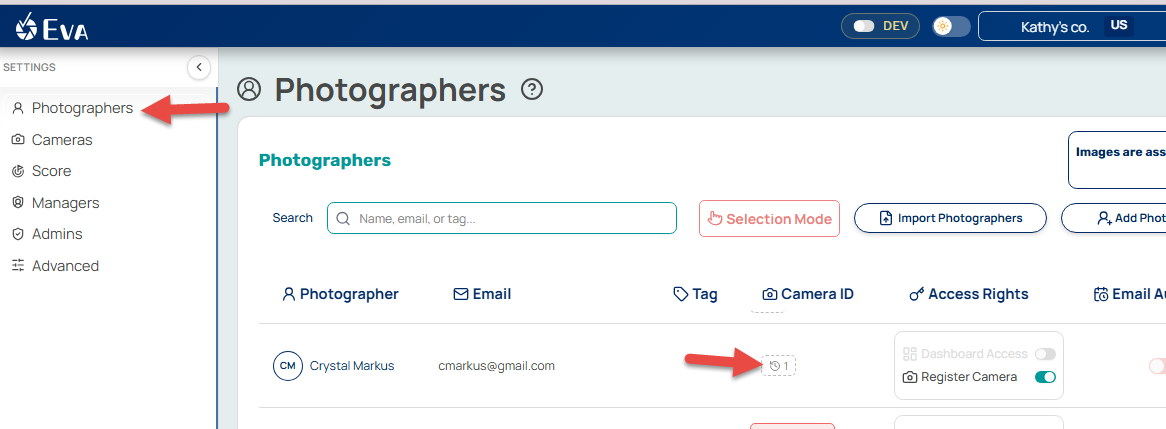 And then drag & drop the camera hardware ID into either the "Current" or "Upcoming" tabs. If you Want to place it in the "Current" tab, you'll have to choose whether you want the date to start today, from the beginning (the first photos you uploaded into EVA), from the last date the camera was assigned to a previous photographer, or if you want to select a start date yourself: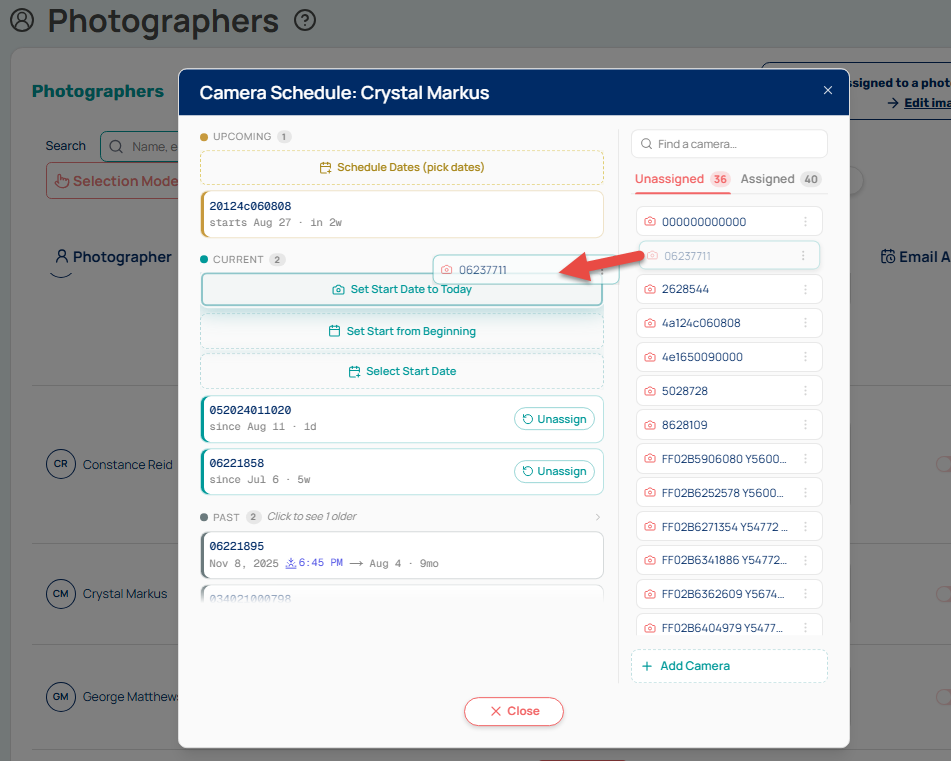
- Click this icon:
From the Cameras page.
- Click on the unassigned camera row on the date you want:
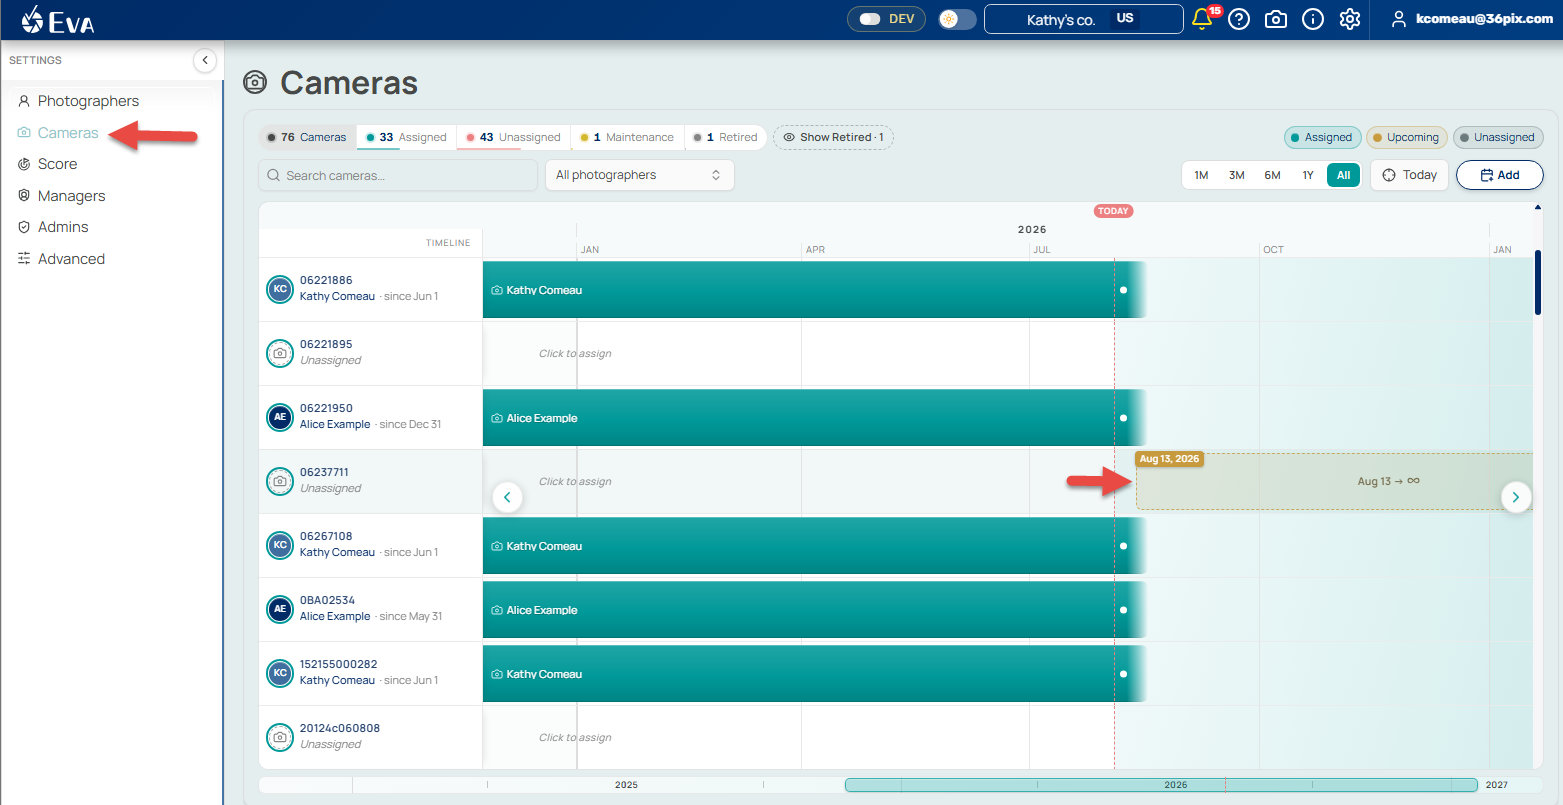 And then fill in all the fields in the popup: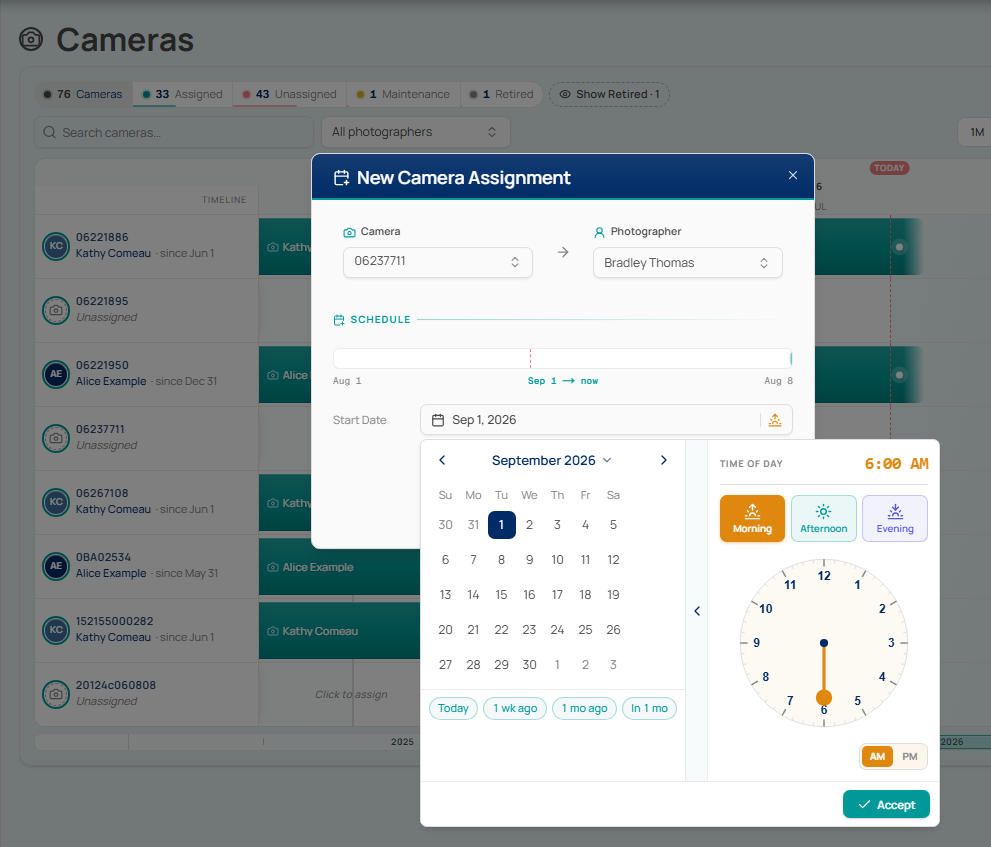
- Click on the unassigned camera row on the date you want:
3. Viewing the Camera Assignment History
A camera may sometimes be used by multiple photographers. Admins can view the camera assigment history in two places.
On the Cameras page:
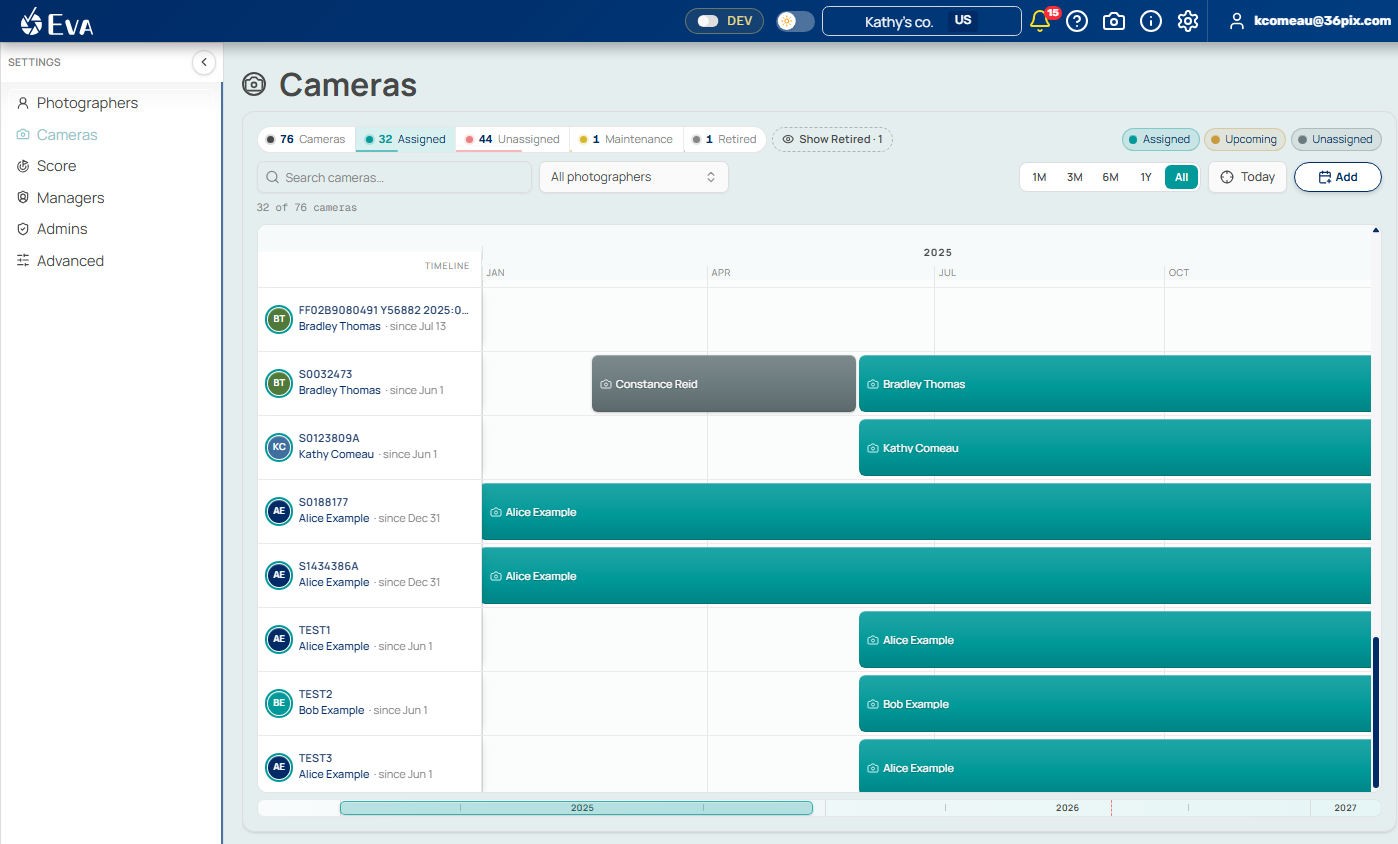
By clicking on the camera schedule icon on the Photographer page:
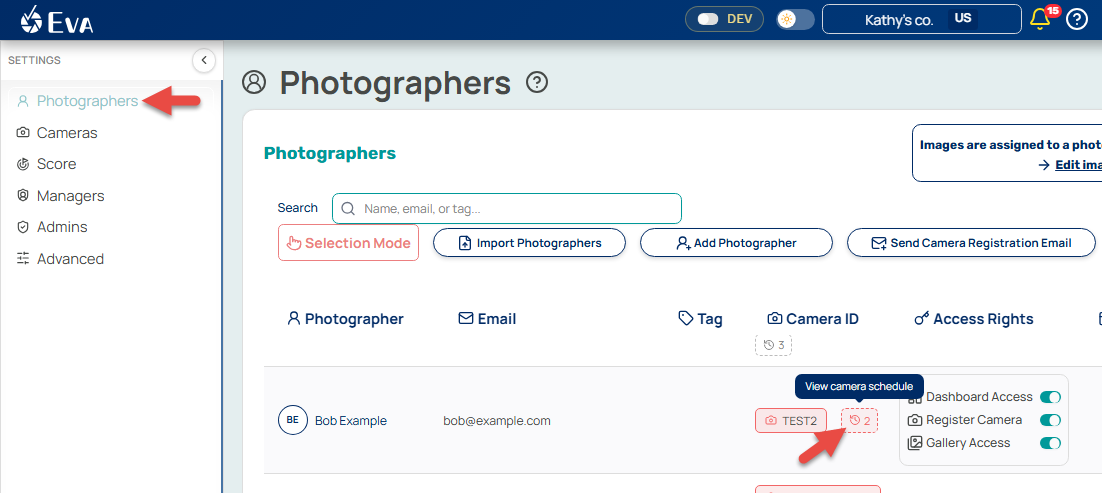
3. Assigning a Camera for Maintenance
If a camera is temporarily out of service, an admin can click on the camera hardware ID from either the Camera page or the Photographer page and then click "Mark for Maintenance" 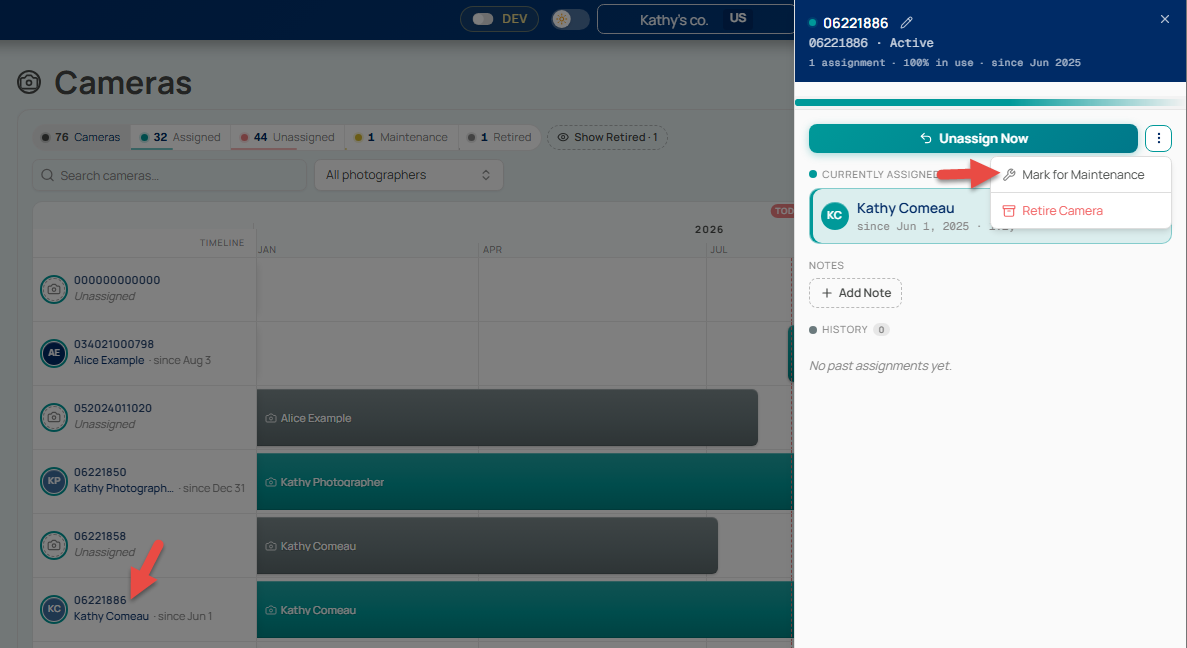
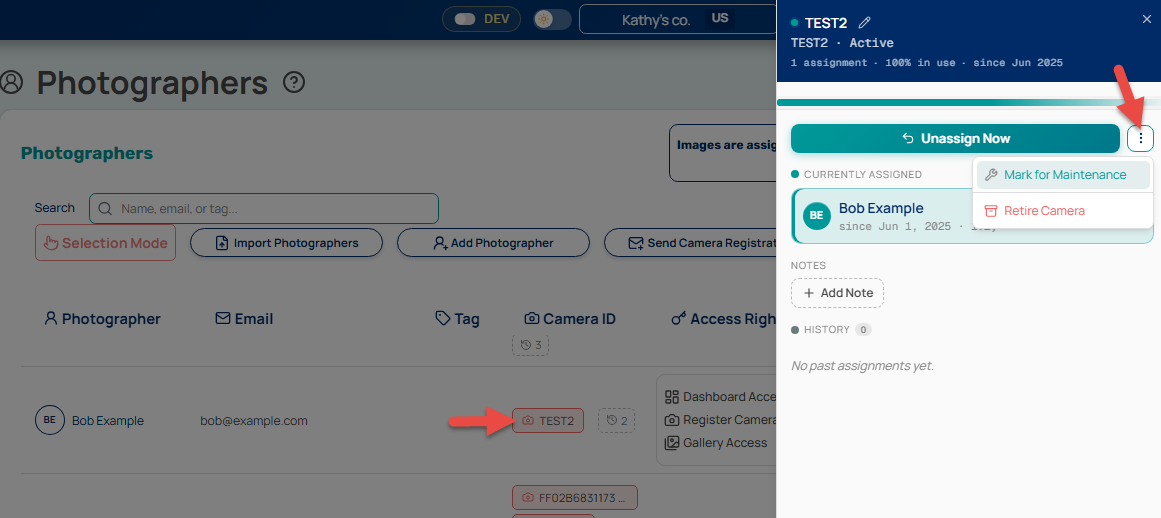
You can also retire a camera if it will no longer be used.
TABLE OF CONTENTS
- 1. Camera Registration by the Photographer
- 2. Camera Assigned by the Admin
- 3. Viewing the Camera Assignment History
- 3. Assigning a Camera for Maintenance
- TABLE OF CONTENTS
- 1. Camera Registration by the Photographer
- 2. Camera Assigned by the Admin
- 3. Viewing the Camera Assignment History
- 3. Assigning a Camera for Maintenance
- TABLE OF CONTENTS